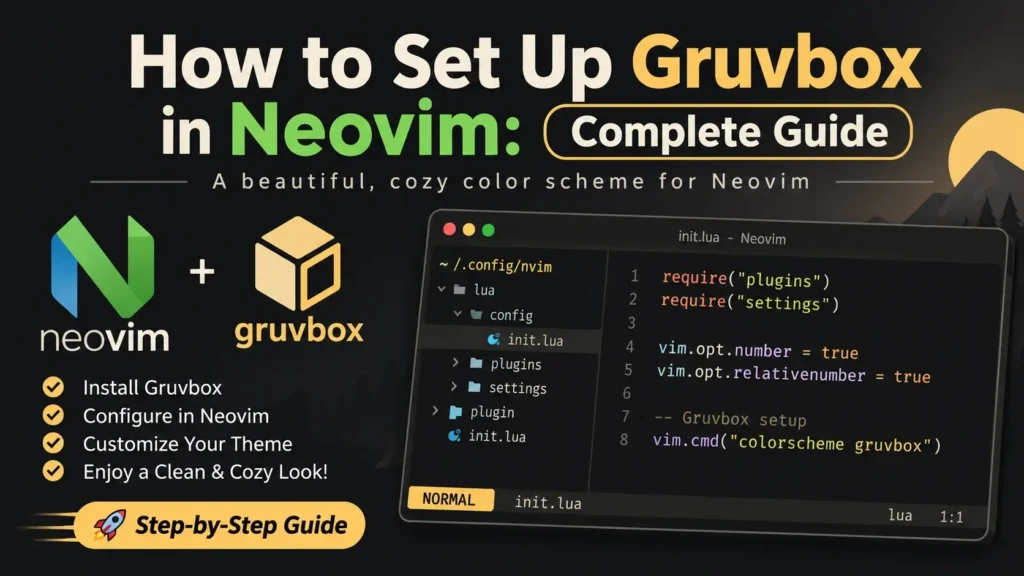
Customizing your Neovim editor with the right color scheme can make coding more comfortable, organized, and visually appealing. Among the many available themes, Gruvbox stands out for its warm, retro-inspired colors, balanced contrast, and distinctive syntax highlighting.
Whether you’re writing Python, JavaScript, Lua, or another programming language, Gruvbox can give your editor a consistent and recognizable appearance.
However, installing and configuring a color scheme in Neovim can feel confusing, especially if you’re unfamiliar with Lua configuration files or plugin managers.
The good news is that setting up Gruvbox in Neovim is straightforward once you understand the installation process.
What Is Gruvbox in Neovim?
Gruvbox is an open-source, retro-inspired color scheme originally created by Pavel Pertsev, known as morhetz, for the Vim text editor.
The theme uses warm charcoal and cream backgrounds combined with shades of red, yellow, green, blue, orange, purple, and aqua.
Over time, Gruvbox became available through multiple community implementations, including Lua-based versions designed specifically for Neovim.
One popular implementation is gruvbox.nvim, maintained by ellisonleao.
This implementation supports modern Neovim features, including Tree-sitter highlighting, custom highlight groups, and configurable theme options.
Unlike conventional themes that rely on pure black or bright white backgrounds, Gruvbox uses warm neutral colors to create a distinctive coding environment.
Key Features of Gruvbox for Neovim
Gruvbox offers several useful features:
- Dark and light themes: Choose between warm charcoal and cream-colored backgrounds.
- Customizable contrast: Switch between standard, hard, and soft appearances.
- Lua configuration: Manage theme settings through Neovim’s Lua-based configuration system.
- Tree-sitter support: Use syntax highlighting with modern parsing tools.
- Transparency options: Remove selected background colors for compatible terminal setups.
- Custom highlight groups: Adjust specific code and interface colors.
- Terminal colors: Apply Gruvbox-inspired ANSI colors when supported by the theme configuration.
- Plugin compatibility: Integrate the theme with many popular Neovim plugins.
These features make Gruvbox suitable for beginners and experienced Neovim users who want a customizable editor appearance.
Gruvbox Neovim Requirements
Before installing Gruvbox, make sure your Neovim environment is ready.
You will generally need:
- A working Neovim installation.
- A compatible Neovim version for your chosen Gruvbox plugin.
- A terminal emulator with true-color support for accurate theme colors.
- A plugin manager such as lazy.nvim, packer.nvim, or vim-plug.
- Access to your Neovim configuration files.
The exact Neovim version requirements depend on the Gruvbox implementation you select.
For the examples in this guide, we’ll focus primarily on the Lua-based ellisonleao/gruvbox.nvim plugin.
Where Is the Neovim Configuration File?
Neovim typically stores user configuration files in different locations depending on the operating system.
| Operating System | Typical Configuration Location |
|---|---|
| Linux | ~/.config/nvim/init.lua |
| macOS | ~/.config/nvim/init.lua |
| Windows | %LOCALAPPDATA%\nvim\init.lua |
If you’re using a modular configuration, some settings may be located in separate Lua files inside a lua/ directory.
Before making changes, create a backup of your existing configuration.
How to Install Gruvbox in Neovim Using lazy.nvim
One of the most convenient methods for installing Gruvbox is through lazy.nvim.
Lazy.nvim is a Neovim plugin manager that supports declarative Lua configuration and plugin management.
Step 1: Open Your Neovim Configuration
Open your Neovim configuration directory.
For Linux and macOS, the typical location is:
~/.config/nvim/Your main configuration file is usually named:
init.luaIf you’ve organized your configuration into modules, locate the file where your plugins are defined.
Step 2: Add Gruvbox to Your Plugin List
If you’re already using lazy.nvim, add the following specification to the plugin list passed to require("lazy").setup():
{
  "ellisonleao/gruvbox.nvim",
  priority = 1000,
  config = function()
    require("gruvbox").setup({
      contrast = "",
    })

    vim.o.background = "dark"
    vim.cmd.colorscheme("gruvbox")
  end,
}
The priority = 1000 setting helps ensure that the theme is loaded before plugins with lower startup priorities.
The configuration function initializes Gruvbox and activates the color scheme.
The empty contrast setting selects the default appearance.
Step 3: Install the Plugin
Save your configuration and open Neovim.
Run:
:Lazy syncLazy.nvim will process your plugin specifications and install missing plugins.
Once installation finishes, restart Neovim if needed.
Step 4: Activate Gruvbox
If Gruvbox has been installed but isn’t active, run:
:colorscheme gruvboxYou should immediately see the editor’s colors change.
To make the theme permanent, keep the colorscheme command in your Lua configuration after the plugin has been loaded.
Step 5: Verify the Installation
Inside Neovim, run:
:colorschemeNeovim should display the name of the currently active color scheme.
If it displays gruvbox, the theme is active.
You can also open a source code file to inspect its syntax highlighting.
Complete Gruvbox Configuration Example for lazy.nvim
If you’re already using lazy.nvim, you can organize your theme configuration in a dedicated Lua file.
For example, create:
~/.config/nvim/lua/plugins/gruvbox.luaAdd:
return {
  {
    "ellisonleao/gruvbox.nvim",
    priority = 1000,
    lazy = false,
    opts = {
      terminal_colors = true,
      undercurl = true,
      underline = true,
      bold = true,
      italic = {
        strings = true,
        emphasis = true,
        comments = true,
        operators = false,
        folds = true,
      },
      strikethrough = true,
      invert_selection = false,
      invert_signs = false,
      invert_tabline = false,
      invert_intend_guides = false,
      inverse = true,
      contrast = "",
      palette_overrides = {},
      overrides = {},
      dim_inactive = false,
      transparent_mode = false,
    },
    config = function(_, opts)
      require("gruvbox").setup(opts)
      vim.o.background = "dark"
      vim.cmd.colorscheme("gruvbox")
    end,
  },
}
This configuration exposes many of the customization options commonly available in gruvbox.nvim.
The spelling invert_intend_guides is the option name used by this implementation; although it looks unusual, it should not be silently changed.
This example assumes your lazy.nvim setup imports plugin specifications from the plugins directory.
For example, your lazy.nvim setup may contain:
require("lazy").setup("plugins")If your configuration uses a different plugin structure, place the specification in the appropriate location instead.
How to Install Gruvbox in Neovim Using packer.nvim
Packer.nvim is another Neovim plugin manager found in many existing configurations.
Although packer.nvim is no longer actively maintained, some developers still use it in established setups.
If your configuration already relies on packer.nvim, you can install Gruvbox without immediately changing plugin managers.
Step 1: Open Your Packer Configuration
Locate the file containing your packer plugin declarations.
Depending on your setup, it may be inside init.lua or a separate Lua module.
Step 2: Add Gruvbox
Inside your existing packer.startup() configuration, include:
use({
  "ellisonleao/gruvbox.nvim",
  config = function()
    require("gruvbox").setup({
      contrast = "hard",
    })

    vim.o.background = "dark"
    vim.cmd.colorscheme("gruvbox")
  end,
})
This example selects Gruvbox Dark with hard contrast.
Step 3: Install the Plugin
Save the configuration and run:
:PackerSyncPacker will install the plugin and update your configuration.
Restart Neovim if necessary.
Step 4: Verify Gruvbox
Run:
:colorscheme gruvboxIf the colors change without an error message, the theme is available.
How to Install the Original Gruvbox Theme Using vim-plug
If you prefer the original Vim-based Gruvbox implementation, you can install it through vim-plug.
The original repository is:
morhetz/gruvbox
This approach is different from installing the Lua-based ellisonleao/gruvbox.nvim plugin.
Step 1: Add Gruvbox to Your vim-plug Configuration
If you use init.vim, add the original plugin declaration inside your existing vim-plug block:
call plug#begin()

Plug 'morhetz/gruvbox'

call plug#end()
If your plugin block already exists, add only the Plug line rather than creating a second block.
Step 2: Install the Plugin
Save the file and run:
:PlugInstallStep 3: Enable Gruvbox
Add the following settings after your plugin configuration:
set background=dark
colorscheme gruvbox
Restart Neovim or reload your configuration.
You should now see the original Gruvbox theme.
Important: The original Vim implementation uses different configuration options from the modern Lua-based gruvbox.nvim plugin. Do not mix their configuration instructions.
How to Enable Gruvbox Dark Mode in Neovim
Gruvbox Dark is recognized for its warm charcoal background and bright syntax colors.
To enable dark mode with the Lua implementation, add:
vim.o.background = "dark"
vim.cmd.colorscheme("gruvbox")
If the theme is already active, switching the background option may update its appearance.
To ensure a consistent startup configuration, set the background before activating the color scheme.
Gruvbox Dark Background Colors
| Variant | HEX Code | Description |
|---|---|---|
| Dark Hard | #1D2021 | Deep charcoal |
| Dark Medium | #282828 | Standard dark background |
| Dark Soft | #32302F | Slightly lighter dark background |
These are the original Gruvbox background values. Different Neovim ports may introduce additional color adjustments.
How to Enable Gruvbox Light Mode in Neovim
Gruvbox Light offers a warmer alternative to traditional white-background editor themes.
It uses cream-colored backgrounds with darker text.
To activate light mode, use:
vim.o.background = "light"
vim.cmd.colorscheme("gruvbox")
With the Lua-based plugin, ensure the theme has already been installed and loaded.
Gruvbox Light Background Colors
| Variant | HEX Code | Description |
|---|---|---|
| Light Hard | #F9F5D7 | Pale cream |
| Light Medium | #FBF1C7 | Standard light background |
| Light Soft | #F2E5BC | Warmer beige background |
Both dark and light modes retain the general Gruvbox appearance while adjusting the foreground and accent colors.
How to Change Gruvbox Contrast in Neovim
Gruvbox offers different contrast settings to change the background appearance.
The Lua implementation supports hard, soft, and default contrast options.
Gruvbox Hard Contrast
require("gruvbox").setup({
  contrast = "hard",
})

vim.o.background = "dark"
vim.cmd.colorscheme("gruvbox")
Hard contrast uses a deeper dark background or a paler light background, depending on the selected mode.
Gruvbox Soft Contrast
require("gruvbox").setup({
  contrast = "soft",
})

vim.o.background = "dark"
vim.cmd.colorscheme("gruvbox")
Soft contrast uses a slightly lighter dark background or a deeper light background.
Gruvbox Default Contrast
require("gruvbox").setup({
  contrast = "",
})

vim.o.background = "dark"
vim.cmd.colorscheme("gruvbox")
This selects the default background contrast.
Tip: Put these options inside your plugin configuration rather than repeatedly calling the setup function from unrelated files.
How to Enable a Transparent Gruvbox Background
Transparent backgrounds are popular among developers who want their terminal emulator’s background or desktop effects to remain visible.
The Lua-based Gruvbox implementation includes a transparent mode setting.
To enable it, use:
require("gruvbox").setup({
  transparent_mode = true,
})

vim.o.background = "dark"
vim.cmd.colorscheme("gruvbox")
This removes certain background colors so the terminal’s own appearance can show through.
Why Is Gruvbox Transparency Not Working?
Several issues can prevent the expected appearance.
Your terminal emulator may not support transparent backgrounds, or its transparency settings may be disabled.
Another plugin may also apply an opaque background after Gruvbox loads.
To troubleshoot:
- Verify that your terminal emulator supports transparency.
- Enable transparency in the terminal’s settings.
- Confirm that
transparent_mode = trueis configured. - Reload the color scheme.
- Check whether another plugin is overriding the background.
Remember that a transparent Neovim theme does not automatically make the terminal window transparent. The terminal must support and configure that effect separately.
How to Enable True Colors in Neovim
Accurate Gruvbox colors depend on your terminal’s ability to display 24-bit colors.
To enable true-color support in Neovim, use:
vim.opt.termguicolors = truePlace this setting near the beginning of your configuration.
For example:
vim.opt.termguicolors = true

require("gruvbox").setup({
  contrast = "hard",
})

vim.o.background = "dark"
vim.cmd.colorscheme("gruvbox")
This tells Neovim to use true-color escape sequences where supported.
If colors still appear incorrect, verify that your terminal emulator supports 24-bit color.
How to Customize Gruvbox Colors in Neovim
One of the useful features of gruvbox.nvim is its support for custom highlighting.
You can change individual syntax colors or interface components without modifying the plugin’s source files.
Example: Customize Comment Colors
require("gruvbox").setup({
  overrides = {
    Comment = {
      fg = "#928374",
      italic = true,
    },
  },
})

vim.o.background = "dark"
vim.cmd.colorscheme("gruvbox")
This example changes the color and style of comments using a Gruvbox gray shade.
Example: Customize the Cursor Line
require("gruvbox").setup({
  overrides = {
    CursorLine = {
      bg = "#3C3836",
    },
  },
})

vim.opt.cursorline = true
vim.o.background = "dark"
vim.cmd.colorscheme("gruvbox")
The cursor line becomes more noticeable against the standard dark background.
Example: Customize Line Numbers
require("gruvbox").setup({
  overrides = {
    LineNr = {
      fg = "#928374",
    },
    CursorLineNr = {
      fg = "#FABD2F",
      bold = true,
    },
  },
})

vim.opt.number = true
vim.opt.cursorline = true
vim.o.background = "dark"
vim.cmd.colorscheme("gruvbox")
This configuration uses muted line numbers and highlights the current line number in yellow.
Example: Override Palette Colors
The plugin also supports palette_overrides.
For example:
require("gruvbox").setup({
  palette_overrides = {
    bright_red = "#FF5555",
  },
})

vim.o.background = "dark"
vim.cmd.colorscheme("gruvbox")
This changes the specified palette color where the theme references it.
Because palette overrides can affect multiple highlight groups, use them carefully.
How to Configure Gruvbox Italics and Bold Text
Gruvbox supports various text styling options.
These can help distinguish comments, strings, and other programming elements.
For example:
require("gruvbox").setup({
  bold = true,
  italic = {
    strings = true,
    emphasis = true,
    comments = true,
    operators = false,
    folds = true,
  },
})

vim.o.background = "dark"
vim.cmd.colorscheme("gruvbox")
This configuration enables bold text where the theme applies it and allows italics for selected syntax elements.
If italics don’t appear correctly, check whether your terminal and selected font support italic rendering.
Gruvbox and Tree-sitter in Neovim
Tree-sitter is a parsing system used by many Neovim configurations for more detailed syntax highlighting.
The Lua-based Gruvbox implementation includes support for Tree-sitter highlight groups.
This allows the theme to style language constructs recognized by the configured parser and highlighting system.
How to Use Gruvbox With Tree-sitter
First, make sure you have installed and configured a compatible Tree-sitter integration for your Neovim version.
Then activate Gruvbox normally:
require("gruvbox").setup({})

vim.o.background = "dark"
vim.cmd.colorscheme("gruvbox")
You generally don’t need a separate Gruvbox plugin just for Tree-sitter highlighting.
However, the Tree-sitter plugin must be configured correctly, and language parsers must be available for the relevant programming languages.
Tree-sitter configuration APIs can vary between versions, so follow the documentation for your installed Tree-sitter integration.
Why Is Tree-sitter Highlighting Not Working?
Possible causes include:
- Missing language parsers.
- Incompatible plugin versions.
- Disabled highlighting.
- Conflicting syntax plugins.
- Custom highlight overrides.
- An outdated Neovim installation.
Check your Tree-sitter installation and confirm that your language’s parser and highlighting integration are functioning.
How to Configure Gruvbox for a Better Coding Experience
Colors are only one part of a comfortable editor setup.
You can also adjust line numbers, cursor highlighting, and other interface options.
For example:
vim.opt.termguicolors = true
vim.opt.number = true
vim.opt.relativenumber = true
vim.opt.cursorline = true
vim.opt.signcolumn = "yes"
vim.opt.scrolloff = 8
These settings provide:
- Accurate true-color rendering.
- Absolute and relative line numbers.
- Current-line highlighting.
- A consistent sign column.
- Additional space around the cursor when scrolling.
You can combine these settings with your preferred Gruvbox configuration.
How to Switch Between Gruvbox Dark and Light
You don’t need to reinstall the theme to switch between dark and light modes.
If Gruvbox is already installed and active, you can change the background setting.
For dark mode:
:set background=darkFor light mode:
:set background=lightWith compatible Gruvbox implementations, the theme updates its appearance when the background option changes.
If it doesn’t refresh as expected, reapply the color scheme:
:colorscheme gruvboxCreate Keyboard Shortcuts for Theme Switching
You can make switching between light and dark modes faster with Lua key mappings.
Add:
vim.keymap.set("n", "<leader>gd", function()
  vim.o.background = "dark"
  vim.cmd.colorscheme("gruvbox")
end, { desc = "Gruvbox Dark" })

vim.keymap.set("n", "<leader>gl", function()
  vim.o.background = "light"
  vim.cmd.colorscheme("gruvbox")
end, { desc = "Gruvbox Light" })
These mappings use your configured leader key followed by gd or gl.
Make sure the selected key combinations don’t conflict with existing mappings.
Common Gruvbox Neovim Problems and Troubleshooting
Even with a correct installation, you may encounter configuration issues.
Below are common problems and practical solutions.
1. Error: Cannot Find Color Scheme Gruvbox
You may see a message similar to:
E185: Cannot find color scheme 'gruvbox'This usually means Neovim cannot locate the theme.
Possible solutions:
- Confirm that the plugin is installed.
- Make sure your plugin manager has loaded Gruvbox.
- Check the repository name for spelling mistakes.
- Verify that the colorscheme command runs after the plugin is available.
- Restart Neovim after updating your configuration.
If you’re using lazy.nvim, open its interface with :Lazy and confirm that the plugin is installed.
Also make sure Gruvbox is not being loaded too late.
2. Gruvbox Is Installed but Not Active
If Gruvbox is installed but Neovim still displays another theme, the colorscheme command may be missing or another plugin may override it.
Try:
:colorscheme gruvboxIf it works, check your startup configuration.
Search for other colorscheme commands that may run afterward.
3. Gruvbox Colors Look Incorrect
If Gruvbox looks different from expected, your terminal may not support true colors correctly.
Enable:
vim.opt.termguicolors = trueAlso check your terminal emulator’s color settings.
If you’re using a terminal multiplexer such as tmux, verify that its configuration supports the required color capabilities.
4. Gruvbox Background Is Not Transparent
If your background remains opaque, verify:
transparent_mode = trueAlso make sure transparency is enabled in your terminal emulator.
Some plugins may override background highlight groups after Gruvbox loads.
5. Gruvbox Italics Are Not Showing
Confirm that italic styling is enabled in your theme configuration.
Check whether your terminal supports italic text and whether your selected font includes italic glyphs.
6. Gruvbox Syntax Highlighting Looks Incomplete
This may happen if Tree-sitter or language-specific syntax highlighting isn’t configured correctly.
Verify the required language parsers and check whether another plugin changes your highlight groups.
You can inspect a highlight group using:
:highlight CommentFor more detailed debugging in supported Neovim versions, use:
:InspectThis can help identify the highlight groups or captures applied at the cursor position.
7. Gruvbox Stops Working After a Plugin Update
Theme behavior can change after plugin or Neovim updates.
Check whether your installed Gruvbox implementation supports your current Neovim version.
Review any breaking changes documented by the plugin and update your configuration if needed.
8. Another Theme Overrides Gruvbox
If another color scheme appears after startup, search your configuration for multiple colorscheme commands.
Remove unwanted duplicates or make sure Gruvbox is activated last.
Also check whether your chosen Neovim distribution automatically configures a different theme.
9. Custom Highlight Colors Are Not Applied
Check that your override settings are passed to require("gruvbox").setup() before activating the color scheme.
If another plugin changes the same highlight group afterward, it may replace your settings.
You can inspect the final highlight values to identify the conflict.
10. Neovim Shows an Error When Loading Gruvbox
First, check whether your configuration contains a syntax error.
For example, missing commas or braces in Lua tables can prevent the theme from loading.
You can view startup error messages using:
:messagesCheck the reported file and line number.
If the problem persists, temporarily use a minimal configuration to determine whether another plugin is causing a conflict.
How to Update Gruvbox in Neovim
Updating Gruvbox depends on your plugin manager.
With lazy.nvim
Run:
:Lazy updateWith packer.nvim
Run:
:PackerSyncWith vim-plug
Run:
:PlugUpdateThese commands update plugins managed by their respective tools.
After an update, restart Neovim if necessary and verify that your color scheme still loads correctly.
How to Uninstall Gruvbox From Neovim
If you want to remove Gruvbox, delete its plugin specification from your configuration.
Then run your plugin manager’s cleanup command.
For lazy.nvim, use:
:Lazy cleanFor packer.nvim, use:
:PackerCleanFor vim-plug, remove the plugin declaration and run:
:PlugCleanBefore uninstalling Gruvbox, select another installed color scheme or remove the Gruvbox colorscheme command from your startup configuration.
Otherwise, Neovim may report an error when it starts.
Gruvbox vs. Gruvbox Material in Neovim
Gruvbox Material is a separate theme inspired by the original Gruvbox palette.
It offers modified color choices and additional visual adjustments.
| Feature | Gruvbox | Gruvbox Material |
|---|---|---|
| Appearance | Classic retro palette | Modified retro palette |
| Dark and light modes | Yes | Yes |
| Contrast options | Yes | Yes |
| Customization | Yes | Yes |
| Neovim compatibility | Yes | Yes |
| Visual style | Original warm colors | Alternative color balance |
If you prefer the classic Gruvbox appearance, the standard Lua-based implementation is worth trying.
If you want a modified palette with additional styling choices, Gruvbox Material may be a suitable alternative.
Best Practices for Using Gruvbox in Neovim
To get the most out of Gruvbox, keep your configuration organized and avoid unnecessary complexity.
Use a compatible Neovim version. Check the requirements of your chosen theme implementation.
Enable true colors. Configure termguicolors for accurate color rendering when supported by your terminal.
Keep one primary colorscheme command. Avoid conflicts caused by multiple themes loading during startup.
Use separate configuration files. A dedicated theme file can make customization easier to manage.
Back up your configuration. Save working settings before making major changes.
Choose readable fonts. A clear monospace font and appropriate font size can improve the coding experience.
Test contrast settings. Experiment with hard, soft, and default backgrounds.
Check plugin compatibility. Some plugins may override highlight groups or interface colors.
Keep plugins updated carefully. Review changes before applying updates to an important development environment.
Frequently Asked Questions About Gruvbox in Neovim
1. How do I install Gruvbox in Neovim?
Install a compatible Gruvbox plugin through a plugin manager such as lazy.nvim. Configure the plugin in Lua and activate it using vim.cmd.colorscheme("gruvbox").
2. What is gruvbox.nvim?
Gruvbox.nvim is a Lua-based Neovim implementation of the Gruvbox color scheme. It supports modern highlighting features and customization options.
3. Is Gruvbox free for Neovim?
Yes. The original Gruvbox and the ellisonleao/gruvbox.nvim implementation are open-source projects.
4. Does Gruvbox support Neovim Lua configuration?
Yes. The ellisonleao/gruvbox.nvim plugin supports configuration through Lua.
5. How do I enable Gruvbox Dark in Neovim?
Set vim.o.background = "dark" and activate the color scheme with vim.cmd.colorscheme("gruvbox").
6. How do I enable Gruvbox Light in Neovim?
Set vim.o.background = "light" and activate the Gruvbox color scheme.
7. How do I change Gruvbox contrast?
With the Lua-based implementation, configure the contrast option as "hard", "soft", or "" for the default setting.
8. How do I enable a transparent Gruvbox background?
Set transparent_mode = true in your Gruvbox setup configuration. Your terminal emulator must also support the desired transparency effect.
9. Why is Gruvbox not loading?
Possible causes include a missing plugin installation, incorrect configuration, incompatible versions, or the colorscheme command running before the plugin loads.
10. Does Gruvbox support Tree-sitter?
Yes. The Lua-based implementation supports Tree-sitter highlight groups. Your Tree-sitter integration and language parsers must also be configured correctly.
11. Can I customize Gruvbox colors?
Yes. The plugin provides options such as overrides and palette_overrides for changing highlight groups and palette values.
12. What is the best Gruvbox contrast for Neovim?
The default contrast is a good starting point. Hard and Soft are useful alternatives depending on your preferences.
13. Does Gruvbox work with LazyVim?
Gruvbox can be integrated into compatible LazyVim configurations by adding the theme plugin and setting the colorscheme option. The exact setup depends on the installed LazyVim version.
14. Can I use Gruvbox with tmux?
Yes. Gruvbox can be used inside Neovim running under tmux. Accurate colors depend on the terminal and tmux color configuration.
15. Does Gruvbox improve coding performance?
Gruvbox primarily changes the editor’s visual appearance. It does not directly improve code execution speed or programming performance.
Final Thoughts
Setting up Gruvbox in Neovim is an effective way to customize your development environment with warm colors, distinctive syntax highlighting, and flexible configuration options.
Whether you use lazy.nvim, an existing packer.nvim setup, or vim-plug, the installation process generally involves adding the theme plugin, configuring its settings, and activating the Gruvbox color scheme.
For most modern Lua-based Neovim setups, ellisonleao/gruvbox.nvim with lazy.nvim is a practical starting option.
Once installed, you can experiment with dark and light modes, adjust contrast, enable transparency, customize highlight groups, and integrate the theme with your preferred development tools.
If you’re new to Gruvbox, begin with the standard dark background and default contrast. Then make small adjustments based on your preferences.